

Green Living

What exactly is a DIY yurt, and why build one?
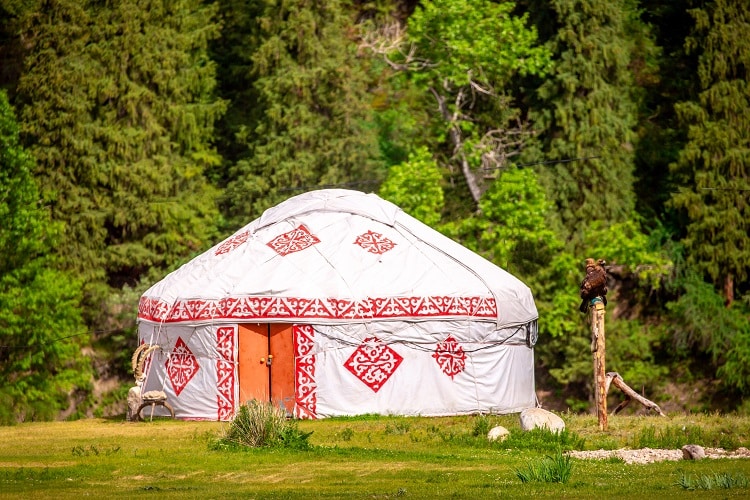
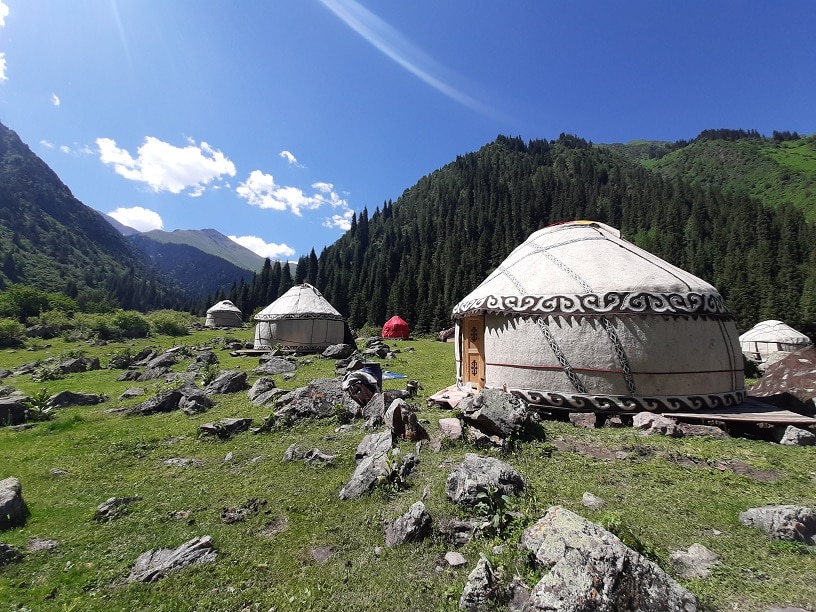
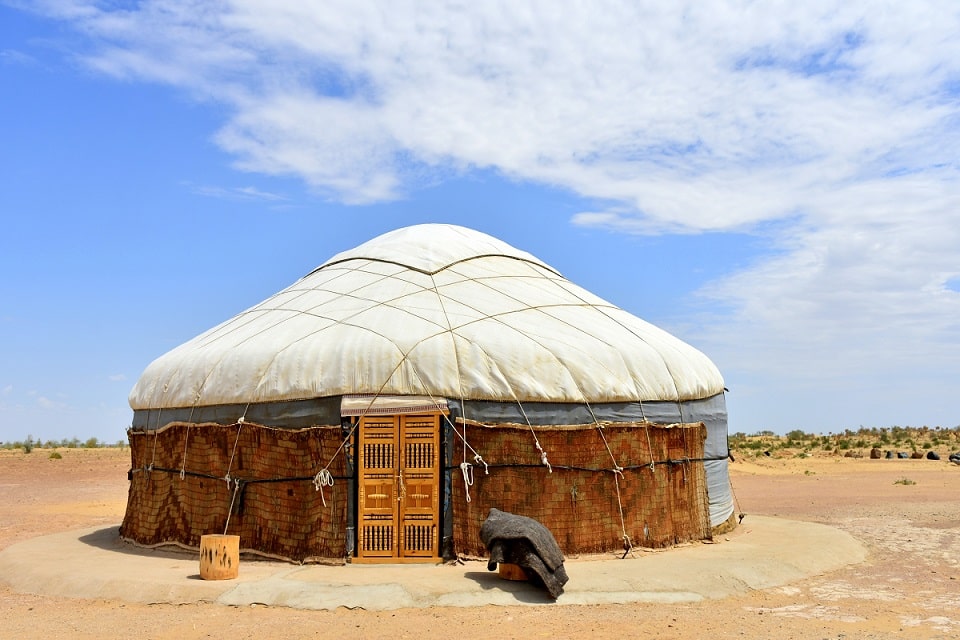
A yurt is a round tent-like structure traditionally used by nomadic people in Central Asia. These constructions gained popularity as they’re unique and versatile, suitable for various settings, from camping and glamping to permanent residential use.
Why do people want to learn how to build a DIY yurt house? DIY yurts are affordable, easily transportable, and energy-efficient. These benefits make them a popular choice for those seeking a sustainable lifestyle. Additionally, the circular design creates a warm and welcoming atmosphere, making them an excellent choice for cozy and unique living spaces.
Can you build a DIY yurt yourself?
For the most part, yes, you can build a yurt yourself. However, the success of such a challenging DIY project will depend on two main factors: your skills and the local regulations regarding yurt construction.
In terms of your skills, building a yurt requires some knowledge of construction and, most importantly, a willingness to learn new tricks. The good news is that many yurt manufacturers provide kits and comprehensive instructions to make building a yurt by yourself a fun and unique experience. You will likely have the necessary skills if you’re familiar with carpentry, roofing, or other construction projects.
On the other hand, if you have no experience with construction, consult an experienced yurt builder to ensure that your new living space is safe.
The second factor to consider is local regulations. Before investing in tools and materials, you want to do your due diligence and find out everything there is to know about the permits and requirements for building a yurt in your area.
How hard is it to build your own DIY yurt?
The difficulty level of building a yurt depends on factors like:
- The size and complexity of the yurt — most yurt houses come in four sizes: 16′, 20′, 24′, and 30′.
- The materials used — canvas, polyester, bamboo, steel, or aluminum.
- Whether you opt for a permanent or temporary foundation.
- Your experience with construction projects.
- The number of people working on it.
Either way, creating a yurt from scratch is a multi-step process and can take anywhere from a few days to several weeks. The following section explains how to build your own yurt with step-by-step instructions so you can get a better idea of whether you can do this by yourself.

How to build a DIY yurt: step-by-step instructions
The following is a general step-by-step guide for building your yurt from scratch. The specific details of the process may vary depending on the type of yurt and the materials used, so it’s essential to consult the yurt manufacturer’s instructions or an experienced builder for guidance.
Preparation stage: materials and tools for construction
The specific materials and tools you need could vary depending on your yurt’s size, design, and features.
The following list includes the most common items needed for yurt construction:
Materials:
- Wooden lattice for the walls and roof
- Fabric cover for the roof and walls
- Insulation for the walls and floor
- Rope or cable for tensioning the lattice walls
- Door frame and door
- Optional: windows, skylight, stove, and other interior features
- Alternatively, you can buy a yurt kit, which includes pre-cut materials and instructions, to simplify the building process.
Tools:
- Landscaping shovel
- Circular saw or hand saw
- Drill and drill bits
- Hammer and nails
- Screws and screwdriver
- Tape measure and level
- Pliers and wire cutters
- Wrenches or pliers for tightening rope or cable
If you’re into DIY projects, you are already familiar with most of these materials and tools and know where to source them.
If this is your first construction project, you can contact local lumber yards and building supply stores to learn about discounts or wholesale pricing. Alternatively, you can check online marketplaces for used or discounted materials and tools.
Stage 1: Building a circular base
- Step 1: Choose a flat location with good drainage and set up a stable foundation for the yurt. Depending on the location and ground conditions, you may need to level the ground with a shovel. If you’re planning to build a permanent yurt on your property, use concrete footings or piers for a stable foundation to prevent the yurt from taking in rainwater.
- Step 2: Determine the exact size of the base by adding a few feet to the diameter of the yurt to allow for a walkway or porch around it.
- Step 3: Use a stake or a small pile of rocks to mark the center point of the circle and a long piece of string or rope to mark the base’s perimeter.
- Step 4: Add cross-bracing or diagonal braces to the frame to ensure levelness and stability.
- Step 5: Attach the decking to the frame using screws or nails to create a solid surface for the yurt to rest on.
Stage 2: Installing the DIY yurt’s door frame and wall lattice:
- Step 1: Cut the wooden slats to the appropriate length and shape for the yurt wall. These slats are usually made of cedar, spruce, or bamboo to be thin and flexible.
- Step 2: Attach the slats to the circular base by screwing or nailing them into place. Place them evenly, with a small gap between each slat for ventilation and light.
- Step 3: Add a second layer to create a double lattice wall. Install the second layer at a slight angle to the first to make a crisscross pattern that adds strength and stability to the yurt wall.
- Step 4: Use a level to ensure that the lattice wall is straight and even around the base. Make any necessary adjustments to the slats to ensure they are correctly aligned.
- Step 5: Install a bottom ring or “pony wall” around the base of the lattice wall to provide additional support and insulation. Use materials like lumber or concrete.
- Step 6: Add a cap or top plate to secure the slats and provide a surface for attaching the roof poles.
- Step 7: Create the door frame using lumber that fits the dimensions of the door opening. You can either purchase a pre-made door or build one using wooden planks.
- Step 8: Attach the door frame to the wall lattice by screwing or nailing it into place. Make sure it is level and securely attached to the wall.
Some yurt builders suggest installing the door frame before the wall lattice. This approach ensures that the door opening is appropriately sized and located, which is crucial when using a pre-made door, as you will need to ensure that the frame fits the door perfectly.
On the other hand, installing the wall lattice first can provide a more stable foundation for the door frame, making it easier to get a precise fit.
Stage 3: Installing the roof structure
- Step 1: Install the compression ring at the highest point of the yurt. This is where the roof poles will be attached.
- Step 2: Assemble the roof poles. All poles should have equal lengths to ensure uniformity.
- Step 3: Choose a location near the entrance or door of the yurt where you will install the first roof pole. Prop the roof pole against the compression ring at the top of the yurt.
- Step 4: Install additional roof poles around the perimeter of the yurt, propping each pole against the compression ring as it is installed. You can proceed in a clockwise or counterclockwise direction.
- Step 5: Continue until all roof poles are installed and connected to the central compression ring at the top of the yurt. Place each roof pole evenly spaced from the last one and connect it to the compression ring at the top.
- Step 6: Secure the roof poles to the circular base by attaching them to the wall lattice with screws or nails.
- Step 7: Ensure all the roof poles stand upright and straight.
- Step 8: Attach the roof covering to the rafters with screws, nails, or clips. Start at the top of the yurt and work your way down to ensure the material is pulled taut.
- Step 9: Install the crown ring by placing it on top of the roof poles and securing it with screws or nails. This element is a wooden or metal ring that sits on top of the compression ring and holds the roof covering material.
- Step 10: Check all the screws and nails to ensure they are tightly in place.
Stage 4: Covering the yurt
- Step 1: Lay the yurt covering material on a clean, flat surface to check for rips or tears. If necessary, patch any holes before continuing.
- Step 2: Roll up the covering material and move it to the yurt site. Unroll it next to the yurt, positioning it to align the door and window openings with the corresponding spots on the yurt wall.
- Step 3: Use a ladder or scaffold to reach the top of the yurt. Attach the covering material to the rafters with screws or nails starting at the roof’s center. Pull it tight to prevent sagging or bunching.
- Step 4: Work your way out from the center, attaching the covering material to each rafter until you reach the roof’s edge.
- Step 5: Attach the covering material to the wall lattice. Start at the top of the wall and work your way down, securing the material to each slat with screws or nails.
- Step 6: Install the door and window covers using screws or bungee cords.
Stage 5: Installing a circular skylight (“toono”) at the top of the yurt
- Step 1: Mark the location for the skylight — traditionally, it’s built at the center of the roof, directly above the crown ring.
- Step 2: Create a template for the skylight by tracing its outline on a large piece of paper or cardboard. Cut out the template and ensure it fits perfectly in the desired location.
- Step 3: Use the template as a guide and carefully cut an opening in the roofing material to fit the skylight.
- Step 4: Install the skylight frame by attaching it to the crown ring and roof poles with screws or bolts.
- Step 5: Place and secure the “toono” in its frame with a central screw, bolt, or locking mechanism. The skylight can be made of various materials that allow natural light to enter the yurt (acrylic, polycarbonate, or glass), depending on the desired aesthetic, functionality, and budget.
- Step 6: Seal gaps around the skylight and frame with a weather-resistant sealant to prevent leaks.
- Step 7: Once everything is securely attached, use rope or bungee cords to tie down the covering material at the bottom of the yurt. This will keep it in place during windy weather.
Stage 6: Finishing touches and decoration
- Step 1: Choose an insulation material that suits your needs, budget, and climate. Some common materials include wool, fiberglass, and spray foam.
- Step 2: Cut the insulation material into appropriate sizes and shapes that match the interior walls and roof of the yurt.
- Step 3: Install the insulation between the lattice wall and the interior covering using clips or ties. You can also add a vapor barrier to keep moisture from penetrating the insulation.
- Step 4: Mark locations for windows and skylights, preferably on the southern side of the yurt, to maximize sunlight exposure.
- Step 5: Cut holes in the lattice wall and cover the edges with flashing to prevent water infiltration.
- Step 6: Install the windows or skylights in the openings using screws or adhesive sealant.
- Step 7: Install flooring, such as carpet or hardwood.
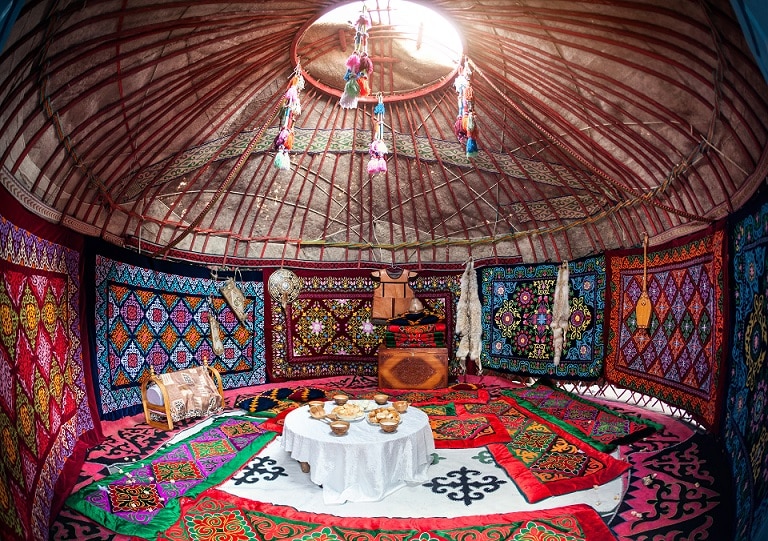
- Step 8: Decorate the interior to your taste and personality by adding furniture, curtains, or tapestries to add color and texture to the interior walls.
- Step 9: Add lighting to improve the ambiance and functionality of the space.
How much does it cost to build a DIY yurt?
The cost of building a yurt depends on various factors, from its size to the materials used to the level of customization. You should also consider labor costs, which vary depending on the experience and location of the builder.
On average, expect to spend between $6,000 and $17,000, but highly-customized models can go over $35,000. Many yurt manufacturers provide yurt cost calculators to help you estimate expenses before deciding.
- Shelter Design Yurts cost calculator
- Blue Ridge Yurts price calculator
- Rainier Outdoor yurt price calculator
How to make a yurt tent on a budget:
- Consider purchasing a yurt kit, which includes pre-cut materials and instructions for assembly to reduce material waste and cut labor costs.
- Source materials locally to avoid shipping costs.
- Ask your friends for help, or hire a local contractor to reduce costs.
- Consider using recycled materials for the circular base and wall lattice.
- Keep the design simple and avoid excessive customization.
Modern sustainable yurts: eco-friendly materials and comfort
The eco-friendly alternatives to traditional construction methods are the fuel that drives the growing interest in modern yurts. From using natural insulating materials like wool or hemp to finishing the construction with non-toxic paints, every step of the building project can become an opportunity to build a sustainable yet cozy living space.
Moreover, many yurt manufacturers also prioritize using renewable energy, with options like solar panels or wind turbines to power the yurt and encourage owners to shift to a self-sufficient lifestyle. These eco-friendly systems help reduce the yurt’s environmental impact and lower energy costs.
If you’re wondering how to build a yurt house with a low impact on your carbon footprint, you can choose from many high-quality, sustainable solutions on the market. Think outside the box; you can install a rainwater collection system, a composting toilet, or a biogas-powered kitchen.
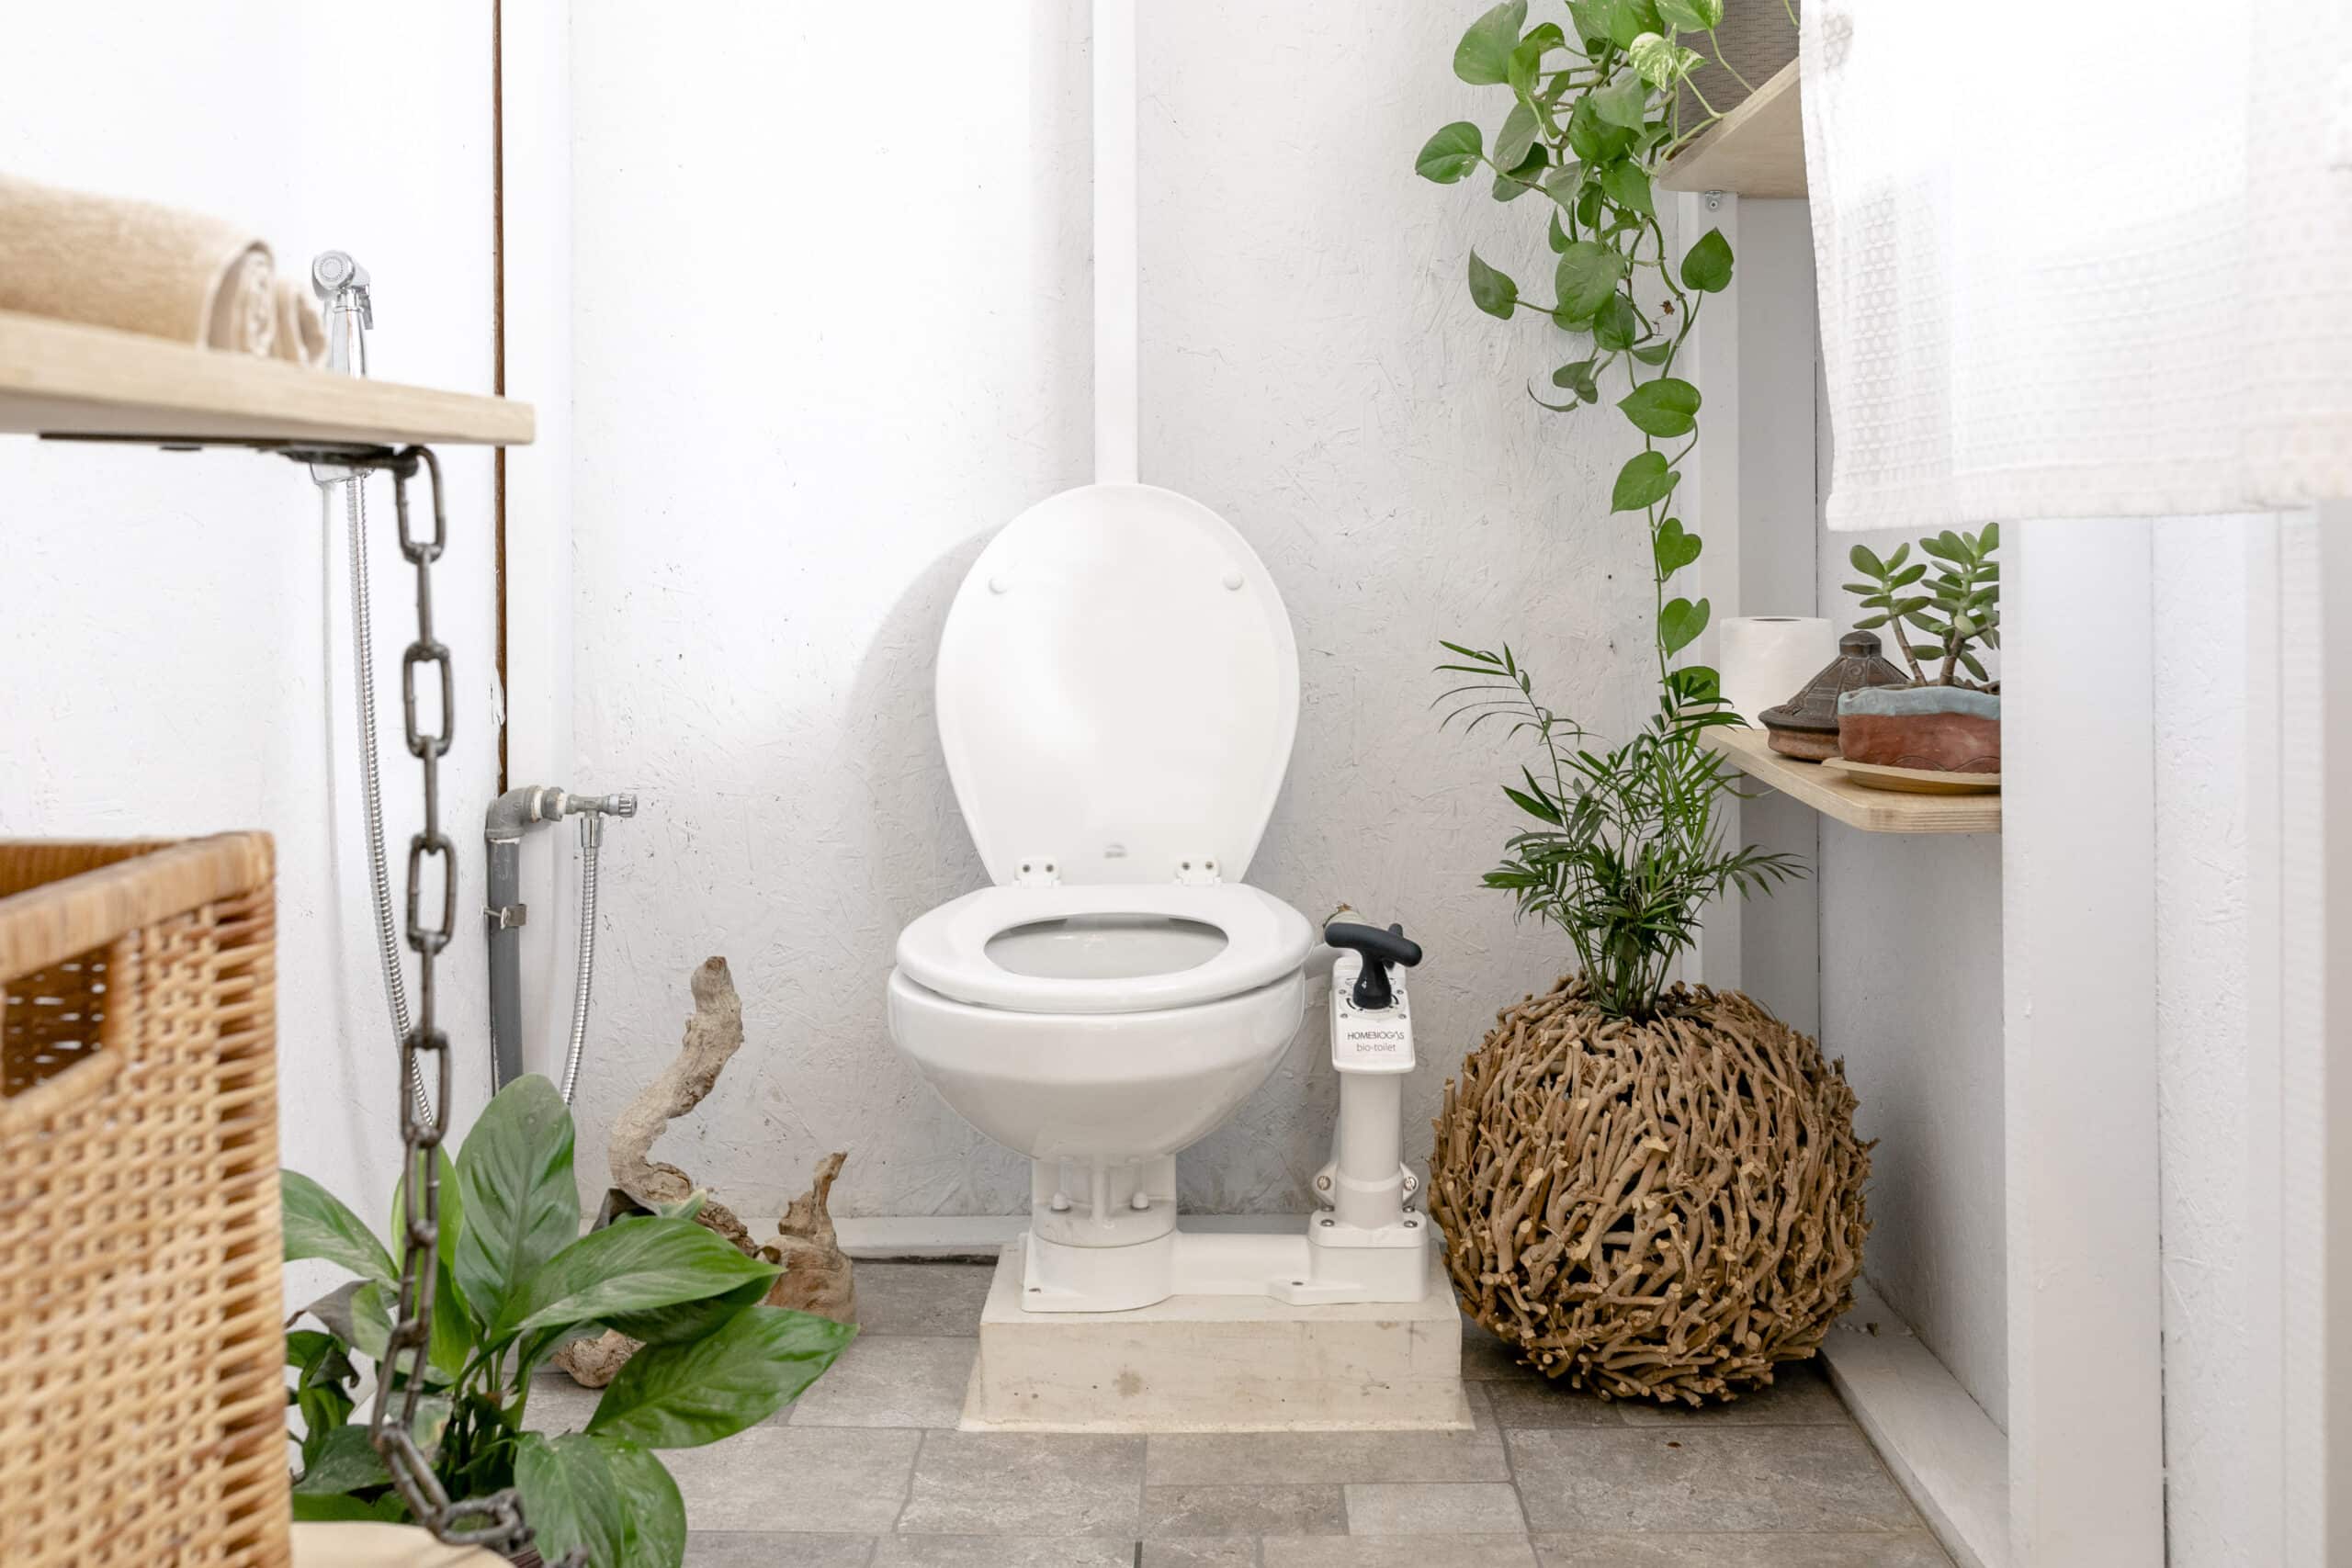
HomeBiogas solutions: composting toilets for yurts
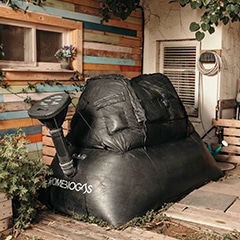
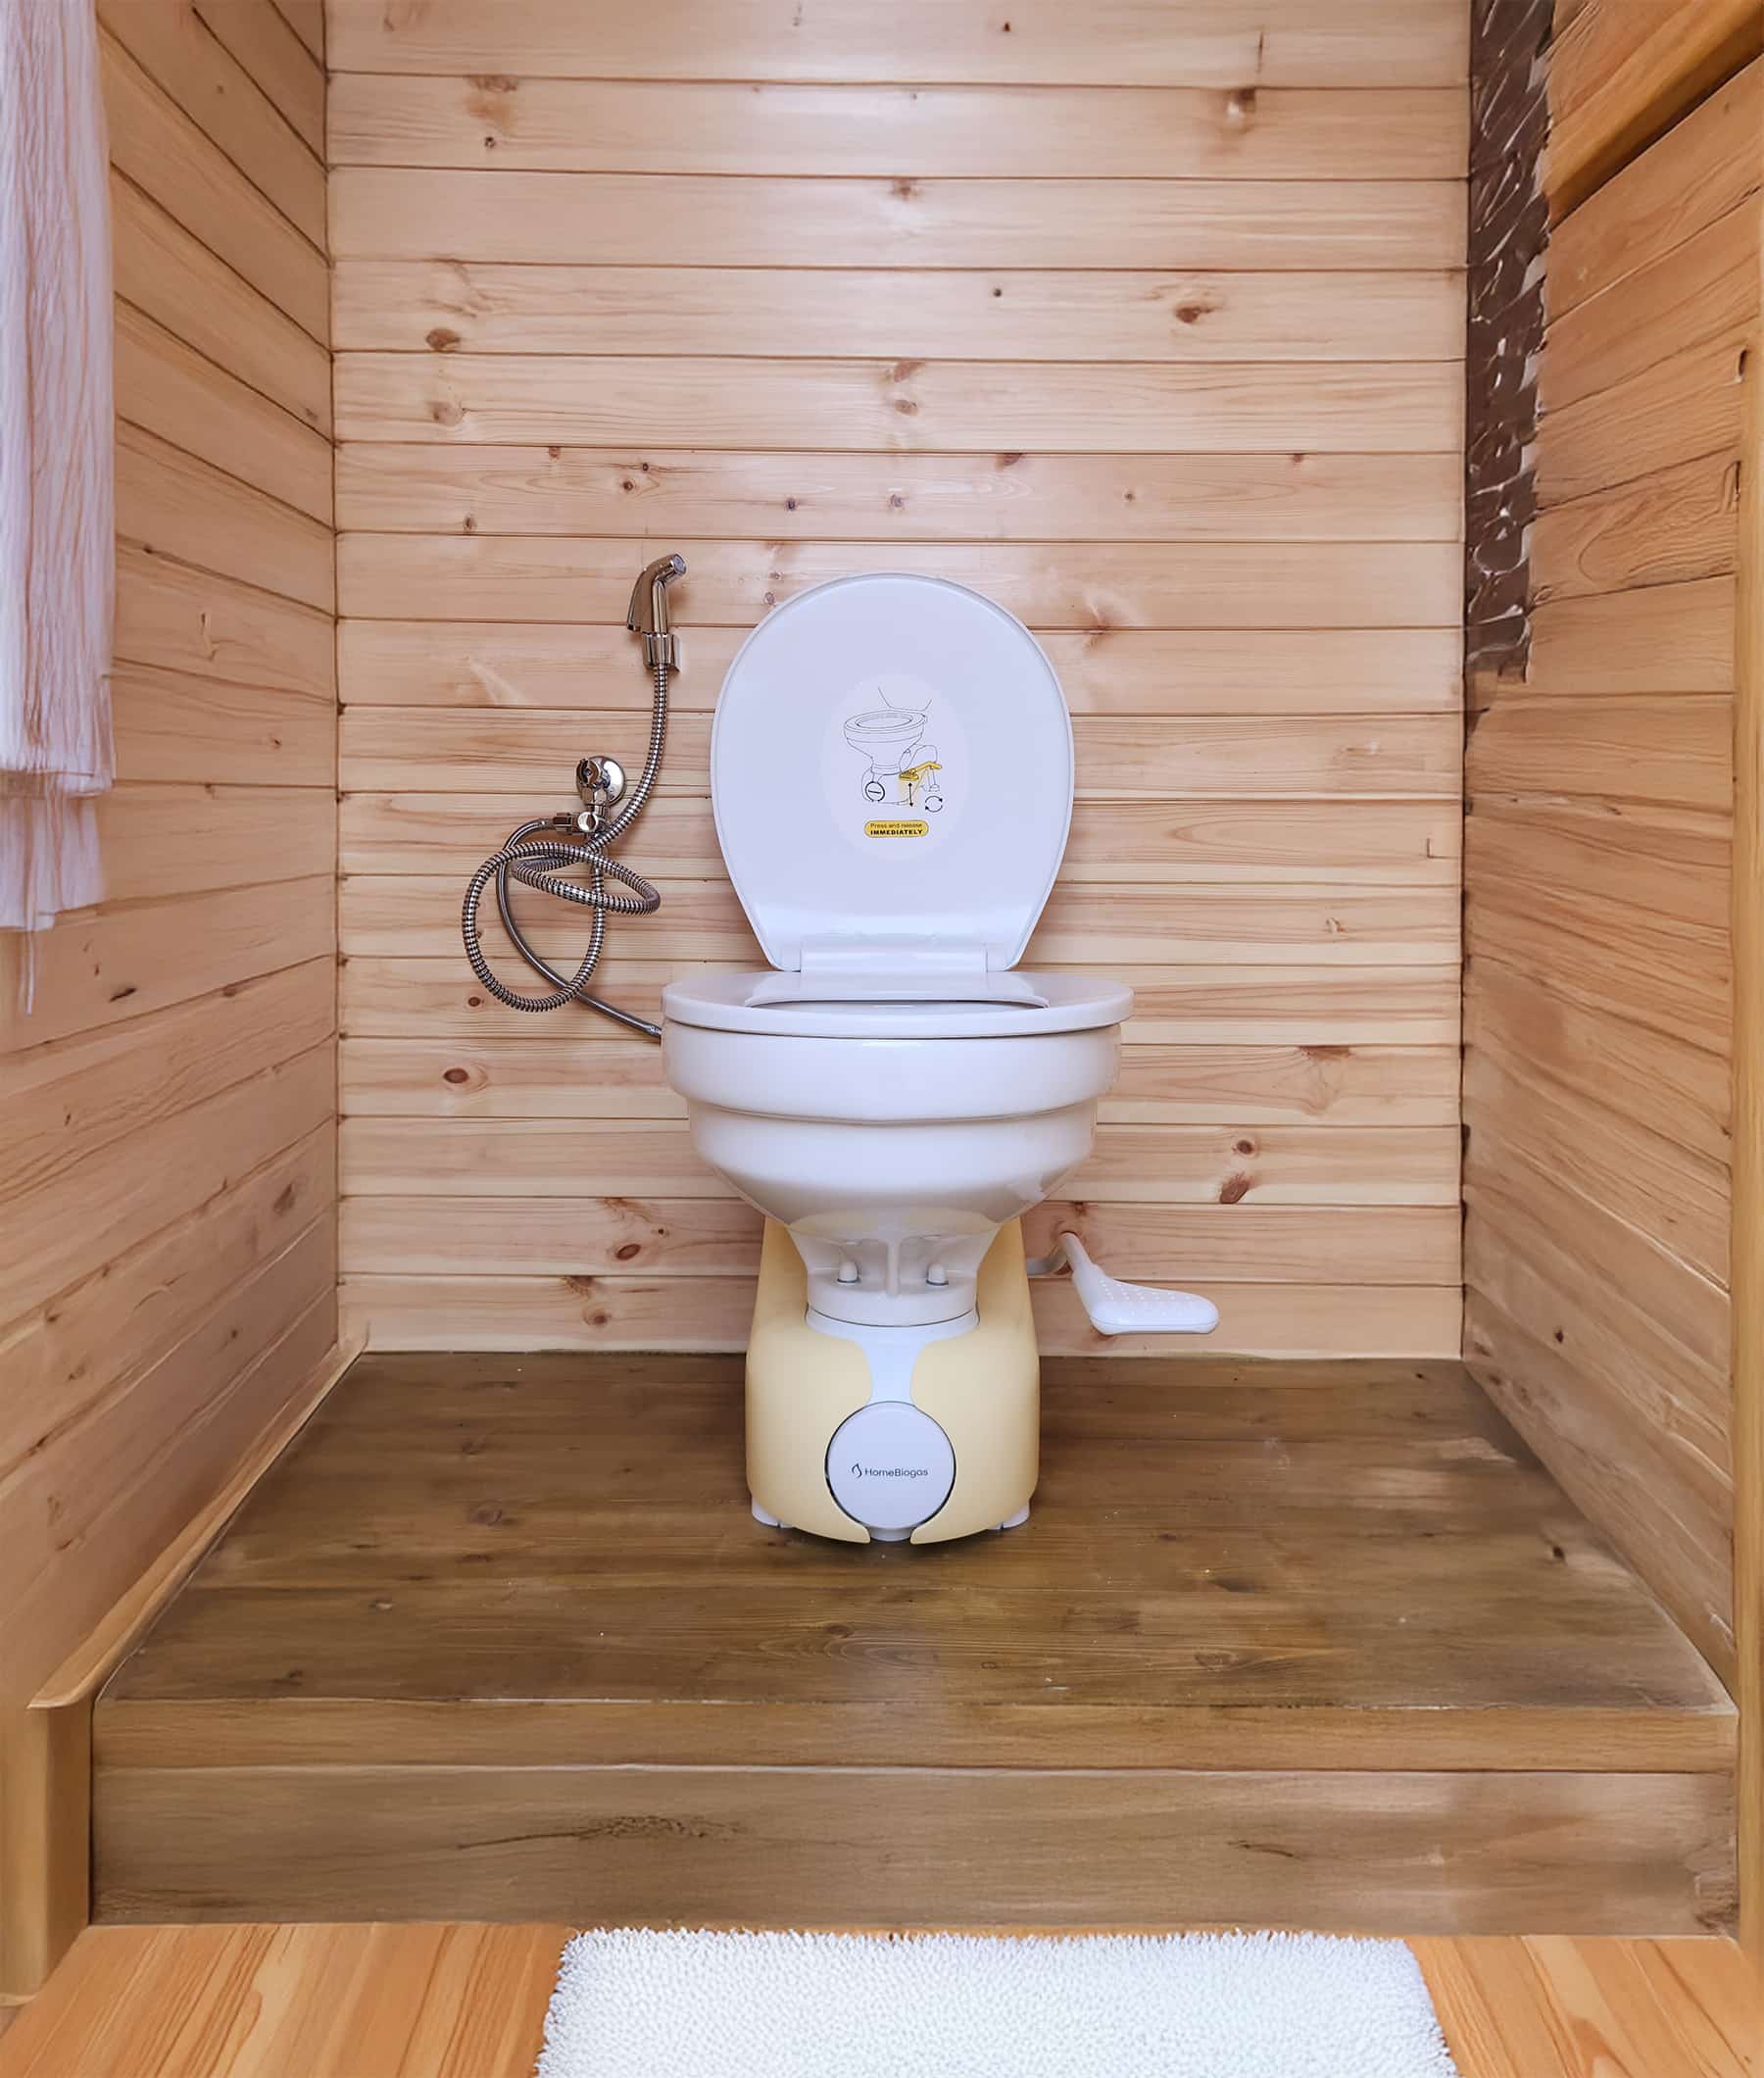
Using a HomeBiogas Bio-toilet in your DIY yurt can significantly enhance your living experience while minimizing its environmental impact. The systems convert human waste into cooking gas and nutrient-rich effluent , which you can redirect to a drainfield or mulch bassin.
HomeBiogas offers a range of Bio-toilet kits to choose from, so you can find the one that best suits your needs. The kit includes a ceramic toilet bowl, a pump, an anaerobic digester, pipes for waste and gas, filters for water and gas, and a cooking stove specially designed to run on biogas.
You can install the ceramic toilet bowl inside the yurt, and the digester outside, which can be ideal for large yurts with divided living spaces inside. Another option is to install the toilet in a separate, enclosed area outside the DIY yurt.
By capturing and utilizing this biogas, you can further reduce your dependence on traditional energy sources and create a more sustainable and self-sufficient lifestyle.
What’s Next?
Building a DIY yurt as a sustainable living space can be a rewarding experience. Follow the steps outlined in this guide to construct a yurt using traditional and modern methods. Make sure you consider factors such as location, materials, and budget before beginning your DIY project. It is also helpful to consult with yurt-building experts or attend workshops to gain additional knowledge and guidance.
With attention to detail and care in each step, you can create a structurally sound, comfortable, and aesthetically pleasing yurt for you and your family. Moreover, use sustainable and eco-friendly materials and incorporate modern features such as natural insulation and a composting toilet. This way, you further enhance your yurt’s comfort and energy efficiency.